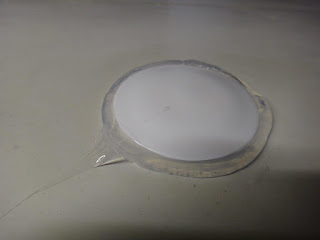
The Land Rover when built was fitted out with radio monitoring equipment for Customs and Excise. Looking at the roof it looks like there was no less than seven different aerials fitted. Some of the aerials have been removed and not necessarily in a good way.
Or aerial stubs simply left in place.
Really keen to get the roof in good order, fundamentally solid and waterproof. To gain access to the underside of the roof, all the interior headlining had to come off. This was held in place with numerous fir tree plugs.
These can be a really tricky to remove. Therefore, decided it would be worth investing in some trim removal tools. Tend to believe if a job is hard you need a better tool. Some of the plugs were in pretty tight so definitely recommend wearing goggles.
The roof lining needed to be removed from the rear of the vehicle first - it's fitted in three overlapping pieces. Given the bulky nature of the lining, decided it would be best to remove the second row of seats now leaving only the front three fitted. The second row of seats was easily removed by only six bolts, two for each seat. In doing so, also got to understand that the second row seats can not only be folded down, but the entire seat can be rocked forwards too once folded. This creates a huge rear load space.
The image above shows the back two roof lining pieces removed. The quality of the roof on the inside is thankfully in excellent condition. Not a spot of rust anywhere. Below is an image seen from the underside of the same hole corresponding to the one with the ugly mastic spread on the top side as shown at the beginning of the article.
Here's some of the aerial cable routed to one of the existing aerial stubs. Front head lining still present.
Image to remind me which way the internal motion detector connects.
To remove the front head lining, the sun roof, rear view mirror and both sun visors needed to come out. Here's Christopher reading through the steps in workshop bible. Surprisingly it really was a five minute job to take out the seals, glass, etc...
As demonstrated, now we have a really big hole in the roof.
With the front head lining removed, access to all the roof metal can be seen. All in really excellent condition. Huge bundles of wire at the front of the vehicle for lighting, etc... Noticed also the rear wash pipe which seems in good order. Will thoroughly check before refitting of the roof lining.
So we're now at a stage where all the roof aerials have now been removed along with associated cables. The various mastic, gaffer tape arrangements on the roof have all gone too. Cleaned up with sticky stuff remover. Essentially there are seven neat holes in the roof ranging from 10mm to 14mm symmetrically along the length. The plan is to plug them with domed plastic threaded stoppers fitted with rubber washers and sealant. One to tackle another day once sourced the type of pieces required.
The dining room is now starting to look like a breakers yard. Katie is just about maintaining a sense of humour.
Below is an image taken from above the front centre roof looking down at the hole where there was once an aerial located. A particularly poor previous owner effort with masking tape to cover the hole.
Used a few applications of "sticky stuff remover" - the gel kind (so it does not run) to get rid of this mess. This bit of the roof section has now cleaned up really nicely.
Some of the other aerial holes had an uneven surrounding roof surface as can be seen in the image below. This would make it awkward to seal effectively.
Therefore decided to make a "puller" to flatten out the surface. This was achieved simply from two pieces of wood with some holes drilled in them. This allowing an M10 bolt to be run through. Note that the piece of wood for the inside had the hole drilled offset from the centre. This allowed for better placement on the inside of the roof to accommodate the outside curve of the roof.
Placing the wooden pieces either side of the roof, subsequent tightening "pulled" the root flat - after all it's only a few mm of aluminium!
The image below just about demonstrates an improved flattening of the roof section around the aerial hole.
After cleaning the holes and wiping down with methylated spirits, some domed plastic threaded stoppers, rubber washers and sealant were used to plug the holes.
Liked these threaded stoppers since they are considerably wider than the aerial holes and are domed to allow bundles of sealant to be loaded under the dome. This helps to make a good seal around the hole.
Some sealant seeping out as the nut on the thread is tightened from the inside.
Wiped off the excess, gently warmed with a hair dryer for a few minutes (It's been cold in the garage) and really pleased with the final result.
Image below taken from the inside. Note that the threads had been trimmed prior to fixing.
An image once all completed - seven in total. The furthermost rear two not visible clearly on this image.


No comments:
Post a Comment