Tuesday, 27 April 2021

Cylinder Block Clean Up

Thought that I'd spend a couple of hours cleaning up the cylinder block. Pieces of the gasket truly welded to the cylinder block. Cylinders also quite dirty. 


Armed with a bundle of "Google" knowledge, decided to carefully take a handled blunt Stanley razor blade to the surface, followed up by using some wet sand paper (120, 600, 3000 and then 7000 grit).


Prepared before hand by stuffing paper hand towel in the various holes and cylinders. When taking the razor blade to remove the gasket, I had a hoover in hand to suck up the gasket flecks as they were removed. What also turned out to be useful was a small diameter rubber hose/straw feed into the hoover nozzle to get into various channels. Final blast off with an air compressor in the holes to remove any last remaining debris. 

Then set about removing some final pieces from the right hand side of the engine block, brake vacuum pump and various gaskets. Again using a razor blade and light sanding with wet 600 grit and paper.


Given that it'll be a little while before refitting the cylinder head and ancillaries, I taped up the engine block with some low tack decorators masking tape.

Fuel Tank Rebuild (Or not)

Piecing things back together after the rear cross member replacement. Starting with the fuel tank. When the garage removed the fuel tank, they broke the plastic pipe from the sender to the fuel line (tank to lift pump). They did confess as much.


This is more than a little annoying. Time to replace the sender (AMR1495). However, looks like there is a bigger issue trying to remove the union to the fuel line.


There is no way that this is budging. As such, thinking might as well go for a new set of fuel lines. However, the line from the fuel tank to lift pump is truly obsolete. Need to think of another solution.

In the mean time, was trying to work out what the following connector is for.


Turns out this is a feed for an electric fuel pump on V8s. Will clean this up and tape to one side.

Monday, 5 April 2021

Cylinder Head Removal

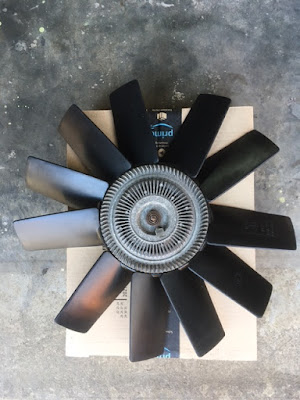
Before the main event, cleaned up the viscous fan and flywheel.


Rocker cover off to reveal the rocker shaft.


Removed 3 bolts and 2 nuts. Pulled out the rocker shaft and inserted some slave bolts to ensure everything remained on the shaft.


Next was time to remove the injectors. Had to use the puller and number 3 injector was a real pain.


Numbered up all the bolts for progressive removal in sequence.


The head is off to reveal the gasket beneath.


Noticed some water in the top of cylinder number 3. Hopefully this is surplus coolant from the cylinder head spilling in when it was removed. Comparing with all the other cylinders, they look similar enough for me to be convinced at this point that the cylinder has not been running with coolant running into it.

Saturday, 3 April 2021

Engine Stand

Needed to purchase a tool to remove the viscous fan. It's a left handed nut. Looking at the engine with the fan in front of you, a slight tap with a hammer on the spanner towards right. Came off no problem.


Tapped out the threads on the crank pulley and fitted the crank extractor arm (without the extractor).


This allowed me to remove the flywheel and its housing. Came off no problem. 

Cleaned up the "business" end. Happy to see that the rear crank seal is in "excellent" condition. 


Then mounted the engine block on to the stand. Quite successful all considered. 


Hopefully get a couple more hours tomorrow and will remove the cylinder head.

Friday, 2 April 2021

Gearbox and Transfer Box Returned

 Gearbox and Transfer box returned back from being rebuilt at Ashcroft Transmissions.


Not had time yet to have a proper look.

That said, they look like brand new units.

Hopefully get sometime later in the week to put on the bench and have a proper look.

Friday, 19 March 2021

Fuel Tank Sender

Looks like the sender on the fuel tank got damaged when the fuel tank was removed during the rear cross member replacement work. This will need to be replaced.

Rear Suspension

The rear shock absorbers were taken off during the chassis work at Buzzweld. Looking at them it is clear that they have seen better days. As such looking to replace them as well as the bump stops.

In trying to identify which part number for the order, needed to determine if the rear suspension is self levelling. This was something new to me. 

Took a look at the "under carriage" and it seems we do indeed have self levelling rear suspension. That was news to me.